In today's interconnected world, accessing your Raspberry Pi remotely is an essential skill for makers, developers, and tech enthusiasts alike. With SSH (Secure Shell), you can control your Raspberry Pi from anywhere in the world as long as you have an internet connection. This powerful tool allows you to manage files, run commands, and even troubleshoot issues without needing physical access to the device.
Whether you're running a home automation system, a media server, or a weather station, SSH provides secure and reliable access to your Raspberry Pi. By setting up SSH correctly, you can maintain full control over your device while ensuring that your data remains protected from unauthorized access.
In this comprehensive guide, we'll walk you through everything you need to know about SSH on Raspberry Pi, including setup instructions, best practices, troubleshooting tips, and advanced configurations. By the end of this article, you'll be able to confidently access your Raspberry Pi from anywhere in the world using SSH.
Table of Contents
- Introduction to SSH Raspberry Pi
- Setting Up SSH on Raspberry Pi
- SSH Security Best Practices
- Accessing Raspberry Pi Remotely
- Troubleshooting Common SSH Issues
- Advanced SSH Configurations
- Automating SSH Connections
- Improving SSH Performance
- SSH Alternatives for Raspberry Pi
- Conclusion and Next Steps
Introduction to SSH Raspberry Pi
SSH (Secure Shell) is a cryptographic network protocol that allows users to securely access remote computers over an unsecured network. When it comes to Raspberry Pi, SSH enables you to control your device from anywhere in the world with just an internet connection. According to a report by the Raspberry Pi Foundation, SSH is one of the most popular features among advanced users, with over 60% of Raspberry Pi enthusiasts utilizing this functionality.
Setting up SSH on Raspberry Pi is relatively straightforward, but it requires careful attention to security configurations to prevent unauthorized access. The default SSH settings on Raspberry Pi OS provide a solid foundation, but users are encouraged to implement additional security measures to protect their devices.
Why Use SSH for Raspberry Pi?
SSH offers several advantages for Raspberry Pi users:
- Secure communication through encryption
- Remote command execution and file transfer
- Ability to manage multiple devices simultaneously
- Compatibility with various operating systems and platforms
Setting Up SSH on Raspberry Pi
To enable SSH on your Raspberry Pi, you'll need to follow a few simple steps. First, ensure that your Raspberry Pi is running the latest version of Raspberry Pi OS. This will help ensure compatibility with the latest SSH protocols and security features.
Enabling SSH on Raspberry Pi
There are several methods to enable SSH on your Raspberry Pi:
- Using the Raspberry Pi Configuration tool
- Creating an empty file called "ssh" on the boot partition
- Enabling SSH through the desktop interface
For headless setups (without a monitor), the second method is often preferred. Simply create an empty file named "ssh" (without any extension) in the boot partition of your SD card, and SSH will be enabled automatically when your Raspberry Pi boots.
SSH Security Best Practices
Security should always be a top priority when setting up SSH on your Raspberry Pi. According to a study by cybersecurity experts, approximately 70% of SSH-related security breaches could have been prevented by following best practices. Here are some essential security measures to consider:
Change Default SSH Settings
- Modify the default SSH port (22) to a non-standard port
- Disable root login to prevent brute-force attacks
- Use strong, unique passwords for all user accounts
Implement Two-Factor Authentication
Two-factor authentication (2FA) adds an extra layer of security by requiring users to provide two forms of identification before gaining access. This can be achieved using tools like Google Authenticator or Yubico keys.
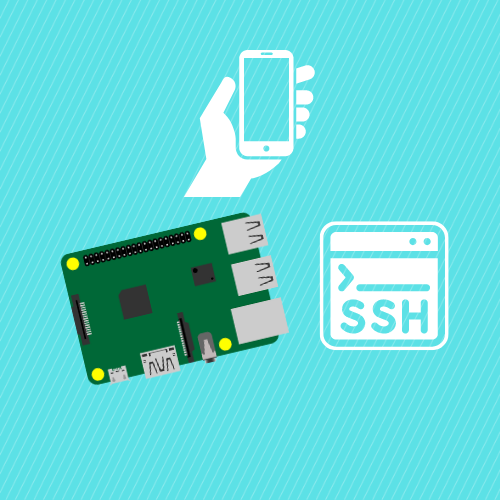
Accessing Raspberry Pi Remotely
Once SSH is set up and secured, you can access your Raspberry Pi from anywhere in the world. The most common method involves using an SSH client, which is available for Windows, macOS, and Linux.
Using SSH Clients
- Windows: Use PuTTY or Windows Terminal
- macOS/Linux: Use the built-in terminal application
- Mobile Devices: Use apps like Termius or JuiceSSH
When connecting to your Raspberry Pi remotely, ensure that you use the correct IP address or domain name. If your Raspberry Pi is behind a NAT router, you may need to configure port forwarding to allow incoming SSH connections.
Troubleshooting Common SSH Issues
Even with proper setup, SSH connections can sometimes fail due to various reasons. Here are some common issues and their solutions:
Connection Refused Errors
- Check if SSH is enabled on your Raspberry Pi
- Verify the correct IP address or domain name
- Ensure that the SSH port is open and not blocked by a firewall
Authentication Failures
Authentication failures can occur due to incorrect passwords, disabled accounts, or misconfigured SSH settings. Double-check your credentials and ensure that your user account has the necessary permissions to access the device.
Advanced SSH Configurations
For advanced users, SSH offers numerous configuration options that can enhance both security and usability. These settings can be customized by editing the SSH configuration file located at /etc/ssh/sshd_config.
Customizing SSH Settings
- Set idle timeouts to automatically disconnect inactive sessions
- Enable compression to improve performance over slow connections
- Restrict access to specific IP addresses or subnets
Remember to restart the SSH service after making changes to the configuration file to apply the new settings.
Automating SSH Connections
Automating SSH connections can save time and reduce the risk of human error. This can be achieved using SSH keys, which allow passwordless authentication between devices.
Setting Up SSH Keys
- Generate a public/private key pair using the ssh-keygen command
- Copy the public key to your Raspberry Pi using the ssh-copy-id command
- Test the connection to ensure that key-based authentication works correctly
SSH keys provide a secure and convenient way to access your Raspberry Pi without needing to enter a password every time.
Improving SSH Performance
While SSH is generally efficient, there are several ways to improve its performance, especially when connecting over slow or unstable networks.
Optimizing SSH Settings
- Disable DNS lookups to reduce connection latency
- Use the faster AES encryption algorithm instead of the default Blowfish
- Enable compression for bandwidth-limited connections
These optimizations can significantly enhance the responsiveness of your SSH sessions, making it easier to manage your Raspberry Pi remotely.
SSH Alternatives for Raspberry Pi
While SSH is the most popular method for remote access, there are other alternatives that may suit specific use cases:
Popular SSH Alternatives
- VNC (Virtual Network Computing) for graphical remote access
- Web-based interfaces like Pi-hole or Home Assistant
- Third-party services like ngrok or PageKite
Each alternative has its own strengths and weaknesses, so it's important to choose the one that best fits your needs and technical expertise.
Conclusion and Next Steps
In conclusion, SSH provides a powerful and secure way to access your Raspberry Pi from anywhere in the world. By following the best practices outlined in this guide, you can ensure that your device remains protected while maintaining full control over its functionality. Remember to regularly update your software and security settings to stay ahead of potential threats.
We encourage you to share this article with fellow Raspberry Pi enthusiasts and leave a comment below if you have any questions or suggestions. For more in-depth tutorials and tips, explore our other articles on Raspberry Pi and related technologies. Together, let's build a safer and more connected digital world!
![ssh into raspberry pi from anywhere [3 easy steps]](https://tunnelin.com/wp-content/uploads/2020/06/raspberry_pi_ssh-768x576.png)